When embarking on a raw journey, we all have the same question on our lips: how best to equip our new kitchen? I sure would have loved some guidance on the matter when I first got started, but had to do most of the research on my own. I thought I'd share some of the info I've come upon in regards to raw equipment, and my honest thoughts about how well these are faring in my kitchen.
What follows are recommendations based on my personal experience. Please bear in mind that each person's needs/preferences may vary. Consequently, what might be a 'must have' piece of equipment for me might not be at all for you. For instance, I LOVE food prep and concocting gourmet meals, and therefore really appreciate the flexibility that a dehydrator gives me for creating different tastes and textures. However, if you're not the culinary type and enjoy very simple and quickly prepared meals, you'll probably find that a good quality blender, a food processor, and perhaps a spiral slicer will be everything you need.
But before we take off on a shopping spree, let's stop for a moment and talk about budget.
 Outfitting Your Kitchen... Without Going Broke
I most definitely didn't have a huge budget to play with, but I figured that investing in good quality tools would pay off in the long run. The process of acquiring all the equipment I was coveting spread over a period of several months, but was definitely worth the wait.
Quality and value being major concerns, I did my 'homework' and looked diligently around the net for the most reliable and cheapest sources to purchase from. In my case (as a lot of the suppliers are located in the States), it also meant one that would ship to Canada for a reasonable fee.
Additionally, I got to learn a few tricks along the way...
5 Tips To Save Money While Equipping Your Raw Kitchen:
1- Look for sales and rebate coupons
2- Look for refurbished items
3- Shop on Ebay - a fab place for items new or used
4- Look at classifieds on sites such as Kijiji and Craig's List
5- Browse through garage sales and thrift stores - you'd be amazed at all the cool stuff to be found!
Raw Foodies' Best Friends
Although you may find most of the tools listed in this article already lying around your kitchen, some will take on a new importance with the raw diet. There are also a few specialty items that will greatly complement your raw culinary adventure.
Blender
I feel that the best place to start is with the single most used appliance in our kitchen: the blender. It runs a minimum of 3 times a day, sometimes more if I'm making sauce, spread or dessert.
For many years I had a 'regular' blender such as a Kitchen Aid or Black&Decker (shown on the right). While it would puree soft fruits and veggies, it didn't do a fantastic job at it. And with the sort of use a blender gets around here, it generally didn't have a very long life span either.
Last Spring, we decided it was time to invest in a 'real beast': a high speed blender. Having had to replace blenders every couple of years at the most, the prospect of spending $300 or $400 on a machine that would last me for many years to come seemed like the way to go.
 It boiled down to either the Total Blender by Blendtec or the Vitamix 5000. Both appliances are very highly rated by the raw food community.
In the end, the Vitamix's 7 year warranty on ALL parts is what sealed it for me. Blendec used to give 8 years on their machine, but then reduced the warranty to 2 or 3 years, and only 1 year on the carafe (the one thing that is most likely to need replacement!) Sure makes you wonder... If they had such confidence in their product, why would they REDUCE the warranty!?!
And so I went with the Vitamix 5000 and am extremely happy with my purchase. It's elegant, easy to use and reliable, and the texture of soups, smoothies, etc is just unreal! It's a wonder how I could do without it all these years!
 Enters The Omni
A couple of years ago we discovered a solid high power blender alternative to the more common Vitamix and Blendtec's Total Blender. Not because these don't do a fine job, but because they leave a great big gaping hole in your budget.
At $279 (shipping included in the USA), the Omni 3 HP blender costs significantly less than similar machines and yet yields a comparable performance.
Some Omni facts:
 As Don points out in his Kitchen Blender Value Review, "clearly the Omniblend V is the substantial Value King as it is about equal to the competition in functionality and expected durability for a much lower cost."
Finally the Omni also comes with a free copy of a raw recipe book that I've written especially for it: Deliciously Raw. (That's how impressed I am with its performance!)
You can find out more about the Omni V 3 HP Blender here.
Looking for a blender that will best suit your needs? Here's a thread you might find helpful.
Juicer
Don and I have been having a freshly made juice of carrots, apples, beets, celery and ginger first thing in the morning for years. Such a delicious, energizing way to start our day!
There are many different juicers to choose from, depending on what you're looking for, and (mostly!) what kind of budget you have. I opted for Breville's Juice Fountain; a centrifugal system with pulp ejection. It has two different speeds and is super easy to clean up, which is absolutely essential, otherwise you'll find yourself not using it as much as you'd like to because it's just "too much work".
Another great feature of the Juice Fountain is it's extra wide food chute. It can even take in whole apples! This means you don't have to chop food into smaller pieces, therefore saving a LOT of prep time.
I bought mine refurbished on eBay for $100 shipped. I know there are much fancier juicers out there, but I'm really very happy with the Breville.
Note: I just found out Amazon sells reconditioned Juice Fountain units for $37.73 - free shipping in the US (Regular price:$149.99). Man, what a deal! You can have a look out here.
 Food Processor
Another 'must have' in a raw kitchen! A food processor is useful for chopping veggies in a snap and making anything from spreads to crackers, cookies, brownies and breads. Again, there are tons of models to choose from. The consensus seems to be that Cuisinart makes great, highly reliable machines. On the downside, they can also be quite pricey so it depends what you're looking for.
For my part, I have a humble 7 cup Rachael Ray, as it's the only model that was powerful enough and available in the local stores (ordering a food processor online wasn't flowing at the time). Definitely not the hottest fp on the market, that's for sure! I've heard people speak very highly of Hamilton Beach brands in the same sort of price range.
You might want to consider getting a smaller size food processor as well, super handy when you don't have a lot of food to process. I'd say that, unless I'm having a big uncooking day and cranking up the dehydrator, I'm mostly using my little Cuisinart Mini-Prep Plus that I found at the thrift store for $3. (Gotta love used stuff!)
 Dehydrator
After following a simple diet of fruit smoothies, raw soups and salads for years, Don and I started experimenting with more complex, dehydrated recipes last fall. We had a hunch that a dehydrator would greatly help us in staying raw through the winter; and we were right. Not only did it allow us to create more elaborate dishes, it provided a fast and simple way to warm up our food before eating. I'm quite aware that this is just a psychological thing, but hey, it did the trick! We find that the dehydrated recipes have come to replace the cooked stuff we used to crave, and therefore haven't felt drawn towards cooked foods at all since.
I played with our neighbors’ old handmade dehydrator for a while and quickly determined that it would be worthwhile investing in an Excalibur. And wow, what a difference! It has made uncooking so much easier and fun!
I highly recommend the Excalibur 9 tray ; it is absolutely the best for the buck! You can find others for a lot cheaper, but they usually have the heat at the bottom (which means you need to rotate the food), or no fan (dehydration takes much longer with high risk of fermentation.)
Excalibur is also available in 5 trays, but in our experience, the trays fill up quickly so that proves to be too small. The latest Excalibur model has a timer and is quite a bit more expensive than the previous one (the ED 2900). Personally, I don't find that feature necessary, as you can pick up a little timer at the hardware store for much cheaper. (Timers are handy if your food is ready in the middle of the night or while you're not around.)
For more general info on dehydrators and how they work, you might want to read Karen Knowler's 'Dehydrator 101' article.
Spiral Slicer
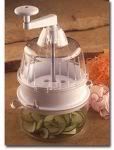 Here's a little gadget that will allow you to make beautiful vegetable pasta in no time at all. You'll see many raw chefs recommend the 'saladdacco' model (shown on the right). To this day, I have to say that this is a bit of a mystery to me. There's a lot of controversy around these in the raw food community, as while the saladacco apparently does work for some, it's a hit and miss thing for many others.
The good news is that there are several spiral slicer alternatives that are much easier to use. After much research, I've opted for the Benriner Cook Help (shown on the left). It produces perfect 'pasta' every single time, and gives me the flexibility of choosing between 3 different sizes - angel hair, spaghetti size and fettucini - which is an awesome feature. Additionally, it allows you to slice vegetables, such as turnip, jicama or beet, very thinly in order to make ravioli wrappers.
 I just love using this gadget! It totally brings out the child in me! lol The uniform veggie pasta it produces has made a world of difference over the grated rendition I used to make. I'd swear it does affect the taste too! And to top it all up, the Cook Help is very easy to clean, and you can purchase a new set of blades should yours become dull.
If you'd like to find out more about the Benriner Cook Helper Slicer, there's excellent and helpful reviews here on Amazon. Their price has also dropped way down over the last couple of years. You can now buy it on Amazon for a little over $45. Awesome deal!
 Mandoline/V-Slicer
A mandoline or V-slicer is an awesome kitchen tool that will help you create uniform veggie slices. It particularly comes in handy for making chips and zucchini noodles for lasagna, or for julienning vegetables for sushi.
One of our main concerns while looking for a mandoline was safety. As you know, these babies tend to be razor sharp, and it wouldn't take much to hurt yourself unless you have a good finger guard.
I thoroughly researched which model would suit me best (and you better believe it: there's a jungle of mandolines out there! lol) In the end, I was seriously considering the Mandoline Plus, but after reading rave reviews after reviews, I fell for the Borner V-Slicer Pro (V-4000).
This model is the next level above their previous, more common V-Slicer Plus (V-1000). Even though the latter is good, its main limitation is that it only offers thin and thick slices. The V-4000, on the other hand, comes with 3 blades, giving a possibility of 9 different cuts. (You can have a look at these here.) Also included with the V-Slicer is a great big food holder so no worries there about safety (unless you don't use it of course! lol) It's sharp, easy to clean and comes with a storing device. I've read stories of people having had the older model for something like 20 years and it still works like a charm! I can tell I'll be having mine for many, many years to come as well. Please Note that the V-4000 is currently unavailable. You can however find the 5000 model as well as the latest 7000 model (with a special patented push button to adjust thickness!) on Amazon.
As Cutlery and More didn't ship to Canada, we found an awesome source in Quebec called PaulsFinest.com. Paul is a really great guy and his service is terrific!
Again, I am totally stoked about my choice as this slicer totally rawks!
Sauerkraut Maker
Until I discovered the raw diet, I was unaware of the numerous health benefits of consuming fermented veggies. If you'd like to get into making your own, I highly recommend the Pickle, Sauerkraut and Kimchi Maker sold by Mike at his The Raw Diet Heath Store. It has a lot of great reviews and, best of all, is quite inexpensive (about $30 including shipping); a much more affordable alternative than the traditional large ceramic crock pots.
RawVegan4Health has ingeniously come up with a home made version of the Sauerkraut and Kimchi maker for roughly $9. You can have a look at his instructions, posted on our forum, Raw Freedom Community.
You might also want to check out my blogpost on Sauerkraut Making here.
Odds and Ends
As you know, there are all kinds of smaller gadgets and tools that are essential to any kitchen, regardless of the diet. These are the ones we find indispensable:
 But specific to raw food prep, here's some kitchen tools that can be particularly helpful:
Offset Spatula - A gem when it comes to spreading batter for crackers, breads, wraps and the like. I'd say the best 10 bucks I ever spent in my kitchen!
Regular Spatula - To get the last scraps out of your food processor or blender
Pizza Cutter - For easily scoring breads and crackers. And yes, to cut raw pizza too! lol
Lettuce Spinner - "No dressing will ever taste right if tossed in wet greens." as Nomi Shannon points out.
Gallon Jars - For sprouting or making kombucha tea
Mason jars - For storing nuts, seeds, dried fruits, etc and for sprouting
Cheese Cloth - For covering the sprouting jars
Plastic Trays - For sprouting (see this post)
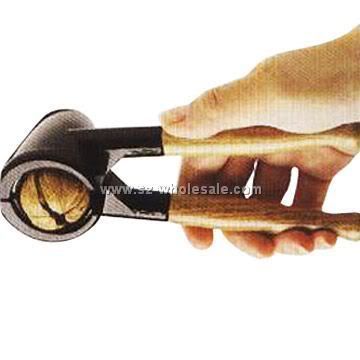 Nut Cracker - We've been buying fresh nuts in their shells in the fall and around Christmas and are loving them. We even have some left from last year and they're still good! Unshelled nuts are cheap and taste so much fresher than the shelled ones. The trick is to have the right tool to help you tackle them. We have the nut cracker shown on the right that we paid something like $12 for at a local kitchen specialty store, and it works like a dream!
 Nut Milk Bags - For separating the pulp while making nut milk which can then be used in recipes such as breads and cookies. (Paint straining bags from a paint store or Home Depot work beautifully and are a lot cheaper!)
Raw Recipe Books - There's tons of raw recipes floating around the net, but you might also want to add a few books to your collection. Check out this thread for highly recommended titles. And there's of course my ebook that I released a few months ago, "The Best of The Sunny Raw Kitchen". It features 21 tried and true recipes, some of the best creations to have come out of our raw kitchen.
MacGourmet - A fantastic recipe program for Mac computers, that allows you to easily organize your recipes. Truly invaluable for me! I talk a little more about some of the fab features it offers here.
A small extra freezer - Not essential, but super handy in order to store ripe bananas and other fruits (for smoothies and ice cream), nuts and dehydrated goodies like breads, cookies, pizza crusts, burgers, etc.
There's all kinds of kitchen gadgets available these days: from avocado or cherry pitters to zesters and ice cream makers; it would be impossible to name them all! But I guess I'll stop here for now, as I think I've pretty much covered the key stuff. (Do let me know if I'm forgetting anything important!)
What follows are recommendations based on my personal experience. Please bear in mind that each person's needs/preferences may vary. Consequently, what might be a 'must have' piece of equipment for me might not be at all for you. For instance, I LOVE food prep and concocting gourmet meals, and therefore really appreciate the flexibility that a dehydrator gives me for creating different tastes and textures. However, if you're not the culinary type and enjoy very simple and quickly prepared meals, you'll probably find that a good quality blender, a food processor, and perhaps a spiral slicer will be everything you need.
But before we take off on a shopping spree, let's stop for a moment and talk about budget.
 Outfitting Your Kitchen... Without Going Broke
I most definitely didn't have a huge budget to play with, but I figured that investing in good quality tools would pay off in the long run. The process of acquiring all the equipment I was coveting spread over a period of several months, but was definitely worth the wait.
Quality and value being major concerns, I did my 'homework' and looked diligently around the net for the most reliable and cheapest sources to purchase from. In my case (as a lot of the suppliers are located in the States), it also meant one that would ship to Canada for a reasonable fee.
Additionally, I got to learn a few tricks along the way...
5 Tips To Save Money While Equipping Your Raw Kitchen:
1- Look for sales and rebate coupons
2- Look for refurbished items
3- Shop on Ebay - a fab place for items new or used
4- Look at classifieds on sites such as Kijiji and Craig's List
5- Browse through garage sales and thrift stores - you'd be amazed at all the cool stuff to be found!
Raw Foodies' Best Friends
Although you may find most of the tools listed in this article already lying around your kitchen, some will take on a new importance with the raw diet. There are also a few specialty items that will greatly complement your raw culinary adventure.
Blender
I feel that the best place to start is with the single most used appliance in our kitchen: the blender. It runs a minimum of 3 times a day, sometimes more if I'm making sauce, spread or dessert.
For many years I had a 'regular' blender such as a Kitchen Aid or Black&Decker (shown on the right). While it would puree soft fruits and veggies, it didn't do a fantastic job at it. And with the sort of use a blender gets around here, it generally didn't have a very long life span either.
Last Spring, we decided it was time to invest in a 'real beast': a high speed blender. Having had to replace blenders every couple of years at the most, the prospect of spending $300 or $400 on a machine that would last me for many years to come seemed like the way to go.
It boiled down to either the Total Blender by Blendtec or the Vitamix 5000. Both appliances are very highly rated by the raw food community.In the end, the Vitamix's 7 year warranty on ALL parts is what sealed it for me. Blendec used to give 8 years on their machine, but then reduced the warranty to 2 or 3 years, and only 1 year on the carafe (the one thing that is most likely to need replacement!) Sure makes you wonder... If they had such confidence in their product, why would they REDUCE the warranty!?!
And so I went with the Vitamix 5000 and am extremely happy with my purchase. It's elegant, easy to use and reliable, and the texture of soups, smoothies, etc is just unreal! It's a wonder how I could do without it all these years!
Enters The OmniA couple of years ago we discovered a solid high power blender alternative to the more common Vitamix and Blendtec's Total Blender. Not because these don't do a fine job, but because they leave a great big gaping hole in your budget.
At $279 (shipping included in the USA), the Omni 3 HP blender costs significantly less than similar machines and yet yields a comparable performance.
Some Omni facts:
- Electronic like the Blendtec but much simpler to use
- Substantially quieter at 85 db
- Somewhat slower RPM means thorough emulsification requires a bit more time than the competition, and for that the motor should experience less stress/longer life
- Comes standard with the 64 fl oz square container and a food tamper
- Has a six blade system
- Comes with a 7 year warranty on parts and labor for the motor/base and 1 year on the drive socket, container and blade assembly
 As Don points out in his Kitchen Blender Value Review, "clearly the Omniblend V is the substantial Value King as it is about equal to the competition in functionality and expected durability for a much lower cost."
Finally the Omni also comes with a free copy of a raw recipe book that I've written especially for it: Deliciously Raw. (That's how impressed I am with its performance!)
You can find out more about the Omni V 3 HP Blender here.
Looking for a blender that will best suit your needs? Here's a thread you might find helpful.
Juicer
Don and I have been having a freshly made juice of carrots, apples, beets, celery and ginger first thing in the morning for years. Such a delicious, energizing way to start our day!
There are many different juicers to choose from, depending on what you're looking for, and
(mostly!) what kind of budget you have. I opted for Breville's Juice Fountain; a centrifugal system with pulp ejection. It has two different speeds and is super easy to clean up, which is absolutely essential, otherwise you'll find yourself not using it as much as you'd like to because it's just "too much work".Another great feature of the Juice Fountain is it's extra wide food chute. It can even take in whole apples! This means you don't have to chop food into smaller pieces, therefore saving a LOT of prep time.
I bought mine refurbished on eBay for $100 shipped. I know there are much fancier juicers out there, but I'm really very happy with the Breville.
Note: I just found out Amazon sells reconditioned Juice Fountain units for $37.73 - free shipping in the US (Regular price:$149.99). Man, what a deal! You can have a look out here.
Food ProcessorAnother 'must have' in a raw kitchen! A food processor is useful for chopping veggies in a snap and making anything from spreads to crackers, cookies, brownies and breads. Again, there are tons of models to choose from. The consensus seems to be that Cuisinart makes great, highly reliable machines. On the downside, they can also be quite pricey so it depends what you're looking for.
For my part, I have a humble 7 cup Rachael Ray, as it's the only model that was powerful enough and available in the local stores (ordering a food processor online wasn't flowing at the time). Definitely not the hottest fp on the market, that's for sure! I've heard people speak very highly of Hamilton Beach brands in the same sort of price range.
You might want to consider getting a smaller size food processor as well, super handy when you don't have a lot of food to process. I'd say that, unless I'm having a big uncooking day and cranking up the dehydrator, I'm mostly using my little Cuisinart Mini-Prep Plus that I found at the thrift store for $3. (Gotta love used stuff!)
DehydratorAfter following a simple diet of fruit smoothies, raw soups and salads for years, Don and I started experimenting with more complex, dehydrated recipes last fall. We had a hunch that a dehydrator would greatly help us in staying raw through the winter; and we were right. Not only did it allow us to create more elaborate dishes, it provided a fast and simple way to warm up our food before eating. I'm quite aware that this is just a psychological thing, but hey, it did the trick! We find that the dehydrated recipes have come to replace the cooked stuff we used to crave, and therefore haven't felt drawn towards cooked foods at all since.
I played with our neighbors’ old handmade dehydrator for a while and quickly determined that it would be worthwhile investing in an Excalibur. And wow, what a difference! It has made uncooking so much easier and fun!
I highly recommend the Excalibur 9 tray ; it is absolutely the best for the buck! You can find others for a lot cheaper, but they usually have the heat at the bottom (which means you need to rotate the food), or no fan (dehydration takes much longer with high risk of fermentation.)
Excalibur is also available in 5 trays, but in our experience, the trays fill up quickly so that proves to be too small. The latest Excalibur model has a timer and is quite a bit more expensive than the previous one (the ED 2900). Personally, I don't find that feature necessary, as you can pick up a little timer at the hardware store for much cheaper. (Timers are handy if your food is ready in the middle of the night or while you're not around.)
For more general info on dehydrators and how they work, you might want to read Karen Knowler's 'Dehydrator 101' article.
Here's a little gadget that will allow you to make beautiful vegetable pasta in no time at all. You'll see many raw chefs recommend the 'saladdacco' model (shown on the right). To this day, I have to say that this is a bit of a mystery to me. There's a lot of controversy around these in the raw food community, as while the saladacco apparently does work for some, it's a hit and miss thing for many others.The good news is that there are several spiral slicer alternatives that are much easier to use. After much research, I've opted for the Benriner Cook Help (shown on the left). It produces perfect 'pasta' every single time, and gives me the flexibility of choosing between 3 different sizes - angel hair, spaghetti size and fettucini - which is an awesome feature. Additionally, it allows you to slice vegetables, such as turnip, jicama or beet, very thinly in order to make ravioli wrappers.
I just love using this gadget! It totally brings out the child in me! lol The uniform veggie pasta it produces has made a world of difference over the grated rendition I used to make. I'd swear it does affect the taste too! And to top it all up, the Cook Help is very easy to clean, and you can purchase a new set of blades should yours become dull.If you'd like to find out more about the Benriner Cook Helper Slicer, there's excellent and helpful reviews here on Amazon. Their price has also dropped way down over the last couple of years. You can now buy it on Amazon for a little over $45. Awesome deal!

A mandoline or V-slicer is an awesome kitchen tool that will help you create uniform veggie slices. It particularly comes in handy for making chips and zucchini noodles for lasagna, or for julienning vegetables for sushi.
One of our main concerns while looking for a mandoline was safety. As you know, these babies tend to be razor sharp, and it wouldn't take much to hurt yourself unless you have a good finger guard.
I thoroughly researched which model would suit me best (and you better believe it: there's a jungle of mandolines out there! lol) In the end, I was seriously considering the Mandoline Plus, but after reading rave reviews after reviews, I fell for the Borner V-Slicer Pro (V-4000).
This model is the next level above their previous, more common V-Slicer Plus (V-1000). Even though the latter is good, its main limitation is that it only offers thin and thick slices. The V-4000, on the other hand, comes with 3 blades, giving a possibility of 9 different cuts. (You can have a look at these here.) Also included with the V-Slicer is a great big food holder so no worries there about safety (unless you don't use it of course! lol) It's sharp, easy to clean and comes with a storing device. I've read stories of people having had the older model for something like 20 years and it still works like a charm! I can tell I'll be having mine for many, many years to come as well. Please Note that the V-4000 is currently unavailable. You can however find the 5000 model as well as the latest 7000 model (with a special patented push button to adjust thickness!) on Amazon.
As Cutlery and More didn't ship to Canada, we found an awesome source in Quebec called PaulsFinest.com. Paul is a really great guy and his service is terrific!
Again, I am totally stoked about my choice as this slicer totally rawks!
Sauerkraut Maker
Until I discovered the raw diet, I was unaware of the numerous health benefits of consuming fermented veggies. If you'd like to get into making your own, I highly recommend the Pickle, Sauerkraut and Kimchi Maker sold by Mike at his The Raw Diet Heath Store. It has a lot of great reviews and, best of all, is quite inexpensive (about $30 including shipping); a much more affordable alternative than the traditional large ceramic crock pots.
RawVegan4Health has ingeniously come up with a home made version of the Sauerkraut and Kimchi maker for roughly $9. You can have a look at his instructions, posted on our forum, Raw Freedom Community.
You might also want to check out my blogpost on Sauerkraut Making here.
Odds and Ends
As you know, there are all kinds of smaller gadgets and tools that are essential to any kitchen, regardless of the diet. These are the ones we find indispensable:
- Knife - A good, sharpened knife is invaluable
- Cutting Board
- Measuring cups and spoons
- Coffee Grinder - For grinding small seeds such as flax and sesame
- Garlic Press
- Grater
- Small Citrus Squeezer
- Strainer
- Peeler
- Various shape pans - For making lasagna, cobblers, pies, cupcakes, quiches, etc.
- Spring form pans or medium plastic tub - For making cakes
- Ziplock bags
- Plastic or glass storage containers
But specific to raw food prep, here's some kitchen tools that can be particularly helpful:Offset Spatula - A gem when it comes to spreading batter for crackers, breads, wraps and the like. I'd say the best 10 bucks I ever spent in my kitchen!
Regular Spatula - To get the last scraps out of your food processor or blender
Pizza Cutter - For easily scoring breads and crackers. And yes, to cut raw pizza too! lol
Lettuce Spinner - "No dressing will ever taste right if tossed in wet greens." as Nomi Shannon points out.
Gallon Jars - For sprouting or making kombucha tea
Mason jars - For storing nuts, seeds, dried fruits, etc and for sprouting
Cheese Cloth - For covering the sprouting jars
Plastic Trays - For sprouting (see this post)
Nut Cracker - We've been buying fresh nuts in their shells in the fall and around Christmas and are loving them. We even have some left from last year and they're still good! Unshelled nuts are cheap and taste so much fresher than the shelled ones. The trick is to have the right tool to help you tackle them. We have the nut cracker shown on the right that we paid something like $12 for at a local kitchen specialty store, and it works like a dream!Nut Milk Bags - For separating the pulp while making nut milk which can then be used in recipes such as breads and cookies. (Paint straining bags from a paint store or Home Depot work beautifully and are a lot cheaper!)Raw Recipe Books - There's tons of raw recipes floating around the net, but you might also want to add a few books to your collection. Check out this thread for highly recommended titles. And there's of course my ebook that I released a few months ago, "The Best of The Sunny Raw Kitchen". It features 21 tried and true recipes, some of the best creations to have come out of our raw kitchen.
MacGourmet - A fantastic recipe program for Mac computers, that allows you to easily organize your recipes. Truly invaluable for me! I talk a little more about some of the fab features it offers here.
A small extra freezer - Not essential, but super handy in order to store ripe bananas and other fruits (for smoothies and ice cream), nuts and dehydrated goodies like breads, cookies, pizza crusts, burgers, etc.
There's all kinds of kitchen gadgets available these days: from avocado or cherry pitters to zesters and ice cream makers; it would be impossible to name them all! But I guess I'll stop here for now, as I think I've pretty much covered the key stuff. (Do let me know if I'm forgetting anything important!)
Hope this article will prove to be of some help to anyone seeking to equip their own raw kitchen.
Happy Outfitting!
Technorati Tags:
Happy Outfitting!
Technorati Tags:





 Posts
Posts