 "Easter spells out beauty, the rare beauty of new life."
 ~ S.D. Gordon
I recently discovered this lovely quote and thought it so captures the spirit of this season. Whether you observe Easter or not, this time of year certainly has lots to rejoice about.
So much life awakening around us...
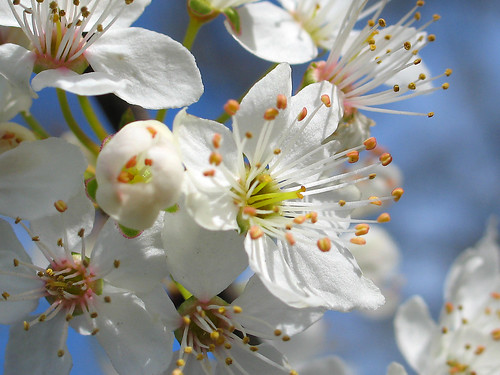
We were blessed earlier this week with the sight of the first flowers to appear in our garden. True beauty indeed!
A few weeks ago, Wyjozu2 of
Raw Food Talk Forum asked that I come up with a raw version of SAD Chewy Turtle Tarts for Easter. What I didn't know at the time was that her simple request was to launch me on a creative uncooking spree of unsurpassed proportions (at least, for me!)
Never Say Never
Well, I can honestly say that I never dreamed I'd one day write an entire post on chocolate. Until recently, Don and I hadn't had chocolate in about 4 years, as we didn't care at all for the undesirable side effects of caffeine. It's after reading raves after raves about RP's Brownies on
Raw Food Talk Forum that, a few months ago, we gave it another try. It was a very tentative one at that; generously cutting the cacao called for in recipes with carob powder.
Stripped To The Bean
As you probably know,
David Wolfe and
Shazzie teamed up a few years ago in order to write their book
"Naked Chocolate", in which they reveal "the astonishing truth about the world's greatest food."
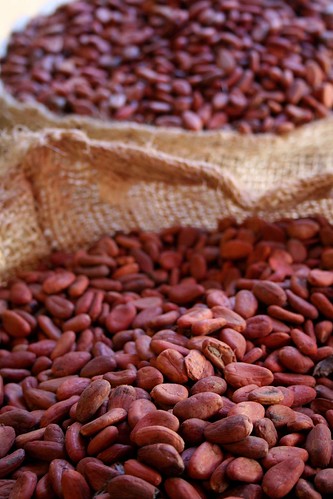
According to David, "Every study on chocolate is pointing to the same conclusion: there is something in chocolate that is really good for us. That something is the raw cacao bean, the nut that
all chocolate is made from. The cacao bean has always been and will always be Nature's #1 weight loss and high-energy food. Cacao beans are probably the best kept secret in the entire history of food."
Chocolate: Can It Really Be Good For You?
In a pamphlet prepared by my friend and Raw Chef Chantale, I just learned that aside from being the best known dietary source of magnesium, raw cacao is exceptionally high in sulphur (the 'beauty mineral'), rich in antioxidants, is an anti-depressant, AND an aphrodisiac! In fact, the cacao bean "contains over 300 identifiable chemical compounds, making it one of the most complex foods known to man."
Experiments have shown that the caffeine and the theobromine contained in chocolate are quite different when consumed raw rather than cooked. Still according to Chantale, "one experiment conducted with a decoction of roasted ground cacao beans in boiling water produced an excitement of the nervous system similar to that caused by black coffee, an excited state of circulation, and an accelerated pulse. Interestingly, when the same decoction was made with raw, unroasted beans, neither effect was noticeable, leading the experimenters to conclude that the physiological changes were caused by aromatic substances released during roasting."
Once again, raw makes ALL the difference! (Why am I not surprised?)
 From The Tree...To Your Kitchen
Cacao beans are the seeds of the cacao fruit, which grows on a jungle tree in Amazonia. You can buy raw cacao as powder and nibs in most health food stores. You can also enjoy the "food of the Gods" in the form of
cacao butter. Although the latter is more difficult to find, it can be ordered from a number of online sources, including
Real Raw Food (a Canadian raw food distributor) and the
Raw Life Health Store.
Welcome To Chocolateland
These findings have dramatically changed the way we've been looking at
cacao. So I turned my sunny kitchen into a veritable little chocolate factory to come up with choc (olate)-full recipes to help us all celebrate Easter (or the return of Spring and New Life) 'in the Raw'.
When taking a breather, I looked back at my 'working space' and couldn't help but laugh at the sheer mess! It's a wonder I managed to operate at all! lol
See for yourself...

The best part about working on this post was of course that we got to taste-test all the recipes (and that's beside the very necessary nibbling that the Chef - yours truly - had to do along the way...) lol
The thing is, not wanting to overdose on chocolate (we have yet to buy raw cacao), we've been only trying a couple of these scrumptious creations every day. Talk about discipline!
Everything turned out above and beyond what we expected! Sooooooo good that Don was standing in the corner spitting nickels! (Boy, are we ever glad we've made a truce with cacao!!!)
Choco Nuts beware! What's coming up is close to 'food porn' and serious drooling material, so have a towel handy.
A'right, are y'all ready? Let the Choc-A-Fest begin...
 Maraw's Chocolate-Dipped Date Truffles (back) and sweetgoddess' Raw Easter Chocolate (front)
The following was posted by sweetgoddess and is a wonderful, simple recipe which looks and tastes just like the SAD version... only a thousand times better!
Raw Easter Chocolate
By sweetgoddess
1 cup
coconut butter
3/4 cup
carob powder ( I bet raw cacao would be even better)
4 Tbsp
agave nectar ( or more to taste)
2 tsp
vanilla (next time I will use orange, mint would be good too)
Put coconut butter in a bowl and place in another bowl of hot water, stirring until liquified. Stir in other ingredients until smooth. Pour onto a parchment paper lined cookie sheet and pop into freezer for 5-10 mins. Alternatively, you could put mixture into little molds.
Carmella's Note:
Lots of room to play with this recipe. You can use a mixture of carob and cacao, throw in some coconut or almonds or whatever nuts you like. You could even give it a fruity touch by adding orange zest or fresh raspberries.
 Cacao Basic Truffle
From Alivefoods.com
1/4 cup
cacao
6 Dried Apricots
1 teaspoon melted
coconut oil
2 teaspoons
agave nectar
1/2
Vanilla Bean
Grind cacao and vanilla bean in a coffee grinder on the espresso setting (if your grinder has one). Add all ingredients into a mini food processor* with the “S” blade. Start by using a pulsing motion until the batter begins to blend. Continue blending until the batterforms a smooth ball on one side of the processor.
*If a larger food processor is used, it will be necessary to double, triple or even quadruple the above ingredients to make sure the batter is above the blades.
Makes 12
Carmella's Note:
These were really sticky and difficult to work with, so I wet my fingers and voila!
I came upon the following thread on Raw Priestess' new site,
RF Living.com, which couldn't be more timely...
Yummy Truffles
By
Christine D. Winters aka Rawpriestess
When I make the truffles, plain, I just use the nuts and dried fruit as a base. I add cacao, or carob or whatever as I see fit, to make them all different. It's just like a basic cookie recipe, where you can add almonds or peanut butter, or chocolate, etc.
1 cup nuts
1 cup dried fruits
Blend in food processor and enjoy!
You may find other ones to try, but these are my favorites:
-
almonds/apricots
-
dates/walnuts
- pecans/raisins
-
macademia/dates
- almonds/ 1/2 dried cherries & 1/2 dates mmmmmmmmm add a dab of coconut, and more mmmmmmmmmm
I couldn't talk about truffles without mentioning Maraw's incredible Chocolate-Dipped Date Truffles, which I had the privilege to recipe-test for her new raw magazine,
Purely Delicious. Although I've already posted the recipe, I thought I'd make it easier for you and post it again...
 Chocolate-Dipped Date Truffles
TheRawTable.com
Chocolate Dip Ingredients:
Chocolate-Dipped Date Truffles
TheRawTable.com
Chocolate Dip Ingredients:
1/4 cup
agave nectar
1/4 cup
coconut oil (at slightly warm room temp - need to be liquid)
3-4 tablespoons raw
cacao powder (you may also use
carob)
1/4 teaspoon
vanilla
pinch of sea salt
Truffles:
8 large
medjool dates
cold
almond butter
With a sharp knife, carefully make a small slit in one side of each date. Remove seed while trying to keep the date as intact as you can. Fill the center of each date with a small bit of almond butter and pinch to close. Set to one side.

In a small bowl, combine, coconut oil or butter, with cocao power, vanilla and salt. Add agave and stir very well until smooth. Take your dates and dip each one in the chocolate mix and place them on wax paper. Allow them to sit in the refrigerator for about 5 minutes. Remove from wax paper and enjoy.
If your agave nectar is cold, you will need to move quickly so that the coconut oil doesn't harden too fast. However, this makes a much nicer, thicker coating for the truffles.
 Turtle Truffles
Here's a recipe that is as versatile as it is delectable, by Cherie Soria of
Living Light Institute.
Turtle Truffles, Chewy Caramels, and Chocolate or Carob Fudge
Recipe posted in
Living Light's February 2007 Newsletter
Makes about 2 1/2 dozen truffles.
Chewy Caramel
1 cup pitted
dates, chopped
1 cup pine nuts, minced
1/2 teaspoon
vanilla extract
Chocolate or Carob Fudge
3 tablespoons
coconut oil
2/3 cup pitted
dates
1/3 cup seedless raisins or dried pitted cherries
dash cinnamon
3/8 cup
cacao powder or
carob
Garnish for Turtle Truffes
1/2 cup perfect pecan halves
1. To make the Chewy Caramel, combine dates, pine nuts, and vanilla in a food processor and process until smooth. Form into small squares to serve as Chewy Caramels. Or, if making Turtle Truffles, place the mixture in the refrigerator while making the carob or chocolate coating.
2. To make the Chocolate or Carob Fudge, put measured coconut oil in a sealed glass jar and place it in warm water to liquefy. Put liquid oil in the food processor with raisins or cherries, dates, and a dash of cinnamon, and process until it forms a smooth ball. Add carob or cocoa powder and continue processing until well mixed. Be careful not to over process the mixture and cause the oils to separate. The mixture should be smooth and tender, but not greasy. Press the fudge into a square shape and cut into small squares.
3. To hand roll Turtle Truffles, form small round balls of caramel using 1 teaspoon of the caramel mixture for each.
4. Next, form small round balls of the carob (or chocolate) mixture using 1 teaspoon for each.
5. Using your thumb, form an indentation in the middle of one ball of fudge. Place a ball of caramel into the indentation and carefully pull the fudge coating up around the caramel, covering the bottom and sides of the caramel with fudge coating. Press a perfect pecan half on top. Repeat until all truffles are formed and refrigerate until firm.
6. Truffles may be stored in the refrigerator in a sealed container until serving. May be frozen or refrigerated for up to one month. If desired put each truffle into a paper candy cup prior to serving.
Carmella's Notes:
As Cherie points out, be careful not to process the pine nuts and dates too long as the mixture will get REALLY oily.
 Chewy Caramel Turtles with Ganache Topping
I came up with this delicious variation. Heavenly!
One batch of Cherie's Chewy Caramel (see recipe above)
Chocolate Ganache from Raw Food Real World (keep scrolling down)
Assembly
I formed the Chewy Caramel mixture into little balls and flattened them lightly.
Then I covered these with the Chocolate Ganache. To make it easier, you can spread a little circle of chocolate on parchment paper. Then put a caramel ball on top and finish covering with chocolate.
Brownies To Live For
This all-time favorite chocolate treat sure has had quite the 'face lift', thanks to two of
Raw Food Talk's creative souls. Raw Priestess' Brownies are now a legend around the board (and probably beyond too). There are so many threads devoted to them, I've stopped counting. A masterpiece of simplicity and goodness.
RP’s Brownies
By
Christine D. Winters aka Rawpriestess
www.rfliving.com
1 cup walnut (unsoaked)
1 cup
dates (pitted unsoaked)
1/4 cup
cacao powder (you may use carob if you like)
Place in food processor, and blend until well blended, should still be dry and chunky, maybe blend about 30 seconds,
Press into a small spring form pan .
Refrigerate until you can insert a knife and it isn't too sticky.
Cut into little pieces, then pop into a zip lock baggie and freeze.
They can be eaten fresh, from the fridge or from the freezer, they won't last long though, these are my newest addiction.
Jocelyn has also contributed a wonderful recipe which got some notoriety of its own. Her
Choc-onut Brownie was recently featured on
RawReform.com when she submitted it to an 'All Time Favorite Raw Treat' recipe contest. And let me tell you, they're now one of our faves too! These were unbelievably good and, to quote Don, "beyond aaaaaaawesome!"
 Jocelyn's Choc-onut Brownie
The chocolate brownie is adapted from
RawGuru's recipe. And then I came up with the coconut creme filling on my own.
Chocolate Crust & Crumb Topping:
4 cups unsoaked pecans
4 cups unsoaked
brazil nuts
1 teaspoon sea salt (original recipe called for 3 tsp.)
1 1/4 cups. raw
cacao powder
3/4 cup raw
carob powder
2 cups soaked raisins (pureed)
6 tbs.
agave nectar (I added a little more agave than it called for - to my desired sweetness)
1/2 cup melted
coconut oil
Coconut Creme Filling 1:
Meat and 1/4 of the juice of 2 young thai coconuts (add more juice to the blender if too thick)
2-4 spoonfuls of
coconut oil
agave nectar (to your desired sweetness)
 Coconut Creme Filling (new version):
2 cups coconut meat
1 cup coconut water
1 cup
cashews, soaked
1/3 cup
agave nectar or dates pitted (to your desired sweetness)
1 teaspoon
vanilla extract
1/2 teaspoon celtic salt
2 T.
coconut oil (optional – to make it a little firmer)
1. Prepare Chocolate Brownie Recipe as follows:
Blend pecans into a fine meal and place in a bowl. Blend the brazil nuts to a fine meal and combine with the pecans. If you want the brownies chunky leave some nuts slightly chopped. Add the salt, cacao and carob powders to the nuts, and mix until well combined. Mix pureed raisins thoroughly into the dry nut mix. Add your agave nectar and coconut oil into the brownie mix and work through it with your hands. The texture will be a bit crumbly.
2) Place 1/2 or 3/4 of the brownie mixture into a 9 X 13" glass dish and press down evenly. Keep the remaining brownie mix for use as the topping over the coconut creme.
Note: Keep the remaining brownie mix crumbly for the topping and be sure you have enough remaining mixture to fully cover the coconut creme filling.
Coconut Creme Filling:
Blend in a blender until smooth and set aside.
3) Pour Coconut Creme Filling on top of pressed brownie mix. Place in freezer until creme is firm - about 1 hour or so.
4) Take choc-onut brownie out of freezer and sprinkle remaining crumbled brownie mix on top of coconut creme filling.
5) Return entire choc-onut brownie back in freezer until ready to serve.
Serving suggestions:
Drizzle berry sauce over individual slices for presentation. For the sauce, just blend your favorite berries (raspberries, strawberries, etc) with agave nectar or honey.
** You may want to thaw the brownie a little before you serve it so it is not so hard. The original Chocolate Ecstacy I was trying to mimick freezes this recipe until ready to serve - which is how I got the idea to freeze. You really don't have to freeze it if you don't want to.
** If you don't have the cacao powder, you can definitely substitute carob powder for it. I'm sure it'll taste just as good. I am going to try that the next time I make it.
New Notes:
I have since made another version for the creme filling that is just as good and a lot more "creamier" (see above). For both versions of the filling, to make it a little more firmer, simply add a couple of T of coconut butter.
Carmella's Notes:
I used part cacao and part carob. I served these with fresh strawberries and a Caramel Sauce topping from "RAW" by Charlie Trotter and Roxanne Klein. Oh well, since it's consistent with the theme of this post, I'll post the whole thing...
Banana Chocolate Tart with Caramel and Chocolate Sauces
From "Raw" by Charlie Trotter and Roxanne Klein
Posted on
Epicurious.com
Tart Shells
3/4 cup plus 2 tablespoons sprouted flour (see tips, below)
1 tablespoon maple syrup
2 tablespoons plus 1 teaspoon extra virgin olive oil
Seeds from 1/2 vanilla bean
Pinch of Celtic sea salt
Caramel Sauce
3 teaspoons heaping raw
cashews, soaked for 8 hours in filtered water
1/4 cup plus 1 teaspoon Cashew Milk
2 tablespoons raw dark honey
2 tablespoons
Date Paste
2 tablespoons maple syrup
For Assembly
4 tablespoons Mexican Chocolate Sauce
8 tablespoons Chocolate Fudge-Almond
28 slices banana
4 tablespoons Honey Walnuts, broken
Method—To make the tart shells: Combine all the ingredients in a bowl and stir to mix well. Place 2 tablespoons of the mixture in the bottom of each of 4 ring molds each 2 inches in diameter. Pack the mixture firmly into the molds. (You will have more dough than you need for 4 molds. Because the tiny tart shells are fragile and time-consuming to make, it is a good idea to line additional ring molds with the remaining dough in case of breakage.) Place the molds on a nonstick drying sheet on a dehydrator shelf and dehydrate at 105°F for 3 hours. Remove the tart shells from the drying sheet and dehydrate directly on the shelf for about 10 hours longer, or until just dry.
To make the Caramel Sauce: Drain the cashews, pat them dry, and then measure them. You should have 1/4 cup; discard any excess. In a high-speed blender, combine the cashews, Cashew Milk, honey, Date Paste, and maple syrup and process until smooth. Strain the purée through a fine-mesh sieve. Set aside 4 tablespoons for the tarts; reserve the remainder for another use.
Assembly—Spoon 1 tablespoon of the Mexican Chocolate Sauce in a circle on each plate. Put a tart shell on top of the sauce. Spread 2 tablespoons of the Chocolate Fudge-Almond on the tart shell. Arrange 7 banana slices on top. Drizzle 1 tablespoon Caramel Sauce over the bananas and on the plate. Sprinkle with the Honey Walnuts.
 Divine Caramel Chocolate Tarts and Creamy Chocolate and Custard Tarts
Tarts Galore
Since we're already into tarts, might as well continue...
Here are a few ideas for tart crusts and fillings. Once you get going, you'll see that the possibilities are endless. The sky is the limit! I didn't even get to create all the combinations that I had in mind. Ah well... I guess I'll just have to play some more later! (Darn!)
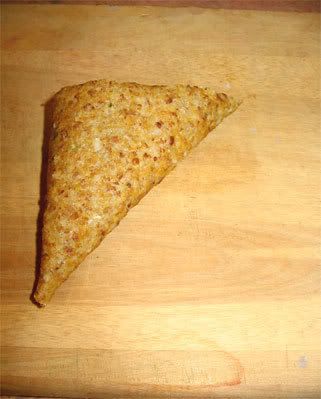
Just Like Baked Crust
This recipe was adapted from a savory crust by
Elaina Love. It is light and looks just like the baked pie crusts.
3 medium sized yellow zucchini, chopped (about 3 cups)
1/2 cup olive or
coconut oil (I used coconut)
1 cup flax meal (about 3/4 cup whole seeds, ground)
1 cup soaked
almonds (about 1/2 cup before soaking for 8 hours)
2 tbs
agave nectar
Blend the zucchini and oil until zucchini is smooth. (I'd recommend warming up your zucchini first, either in the D or in a bowl of warm water, otherwise the coconut oil will 'seize up' on you and you won't get the smooth consistency you're looking for.)
Add the almonds and continue to blend until the entire mixture is smooth. You may need to use a spatula to get the mixture to blend.
Pour the blended mixture into a bowl and add the flax meal.
OK, now I've experimented with a couple of different ways to form the dough into mini crusts. It's for you to pick the one that works best for you.
Method 1
First, line a muffin pan with saran wrap. Alternatively, you could use little paper muffin cups or even cut out little circles in parchment paper for the bottoms and lightly oil the walls of the muffin cups. Put about a couple of tbs of dough in one of the muffin cups. Then, spread it thinly with a wet spoon (makes it easier to work with) and your fingers, all along the bottom and 'walls'.
Pop into the D for a few hours. Once the outside shell is dry, pull on the saran wrap and gently turn the shells over onto the mesh to finish dehydrating.
Method 2
Here is my favorite method. Quick and simple.
Form the batter into uniform circles of about 3 " in diameter on the teflex sheets. Dehydrate for a few hours, then proceed as follows.
Gently peel a circle off onto one of your hands:

Place on top of a muffin cup, 'wet' side up:

Carefully push the circle of dough onto the muffin pan...

...then press with a wet spoon or your fingers to even the dough out.

Dehydrate for a few more hours until completely dry.
Graham Cracker Pie Crust
By Renee Loux Underkoffler
Posted on Raw Food Talk by NoGMO!
2 cups pecans
4 to 6 soft
dates, pitted
1 tablespoon
agave nectar or raw honey
2 tablespoons raw
carob powder
1 tablespoon cinnamon
2 teaspoons ground nutmeg, ideally ground fresh
1 tablespoon non-alcohol
vanilla extract (optional)
Pinch sun-dried sea salt
Soak 1 cup of pecans in 2 cups fresh water for 2 to 4 hours. Drain and rinse.
In food processor, chop 1 cup of dry pecans into fine meal. Set aside.
Chop soaked pecans into fine meal. Cut or break dates into pieces. If dates are very dry or firm, soak them in 1/2 cup of fresh water for 5 minutes to soften.
Add date pieces, agave nectar or honey, carob, cinnamon, nutmeg, vanilla and sea salt to ground soaked pecans and chop until well mixed.
Dough should be crumbly but sticky enough to hold a shape when pressed.
Press dough evenly into a pie plate or a torte pan. (To make tarts, press into muffin pans lined with saran wrap. This will help remove the assembled tarts later without damaging them. If you aren't too keen on the stuff, I'd recommend making a big pie instead of tarts.) It is best to press dough to sides of plate or an first and then press into bottom for even depth.
To scallop edge of crust: Use thumb and forefinger to pinch edge of dough successively around rim.
Use forefinger of other hand to press against pinches to keep them neat. Fill, frost and serve.
OK, now that you've got your crusts all ready, take your pick amongst the following scrumptious fillings...
 Divine Caramel Chocolate Tarts
In the end, WyJoz is the one who suggested the caramel and chocolate sauce recipes that went into these raw 'Turtle Tarts'. They are the absolutely most decadent raw dessert we've ever, EVER tasted! Thanks Joz, you deserve all the credits!
RP's Caramel
By
Christine D. Winters aka Rawpriestess
www.rfliving.com
1 cup
dates (pitted and unsoaked)
1/4 cup
almond milk
1 dash sea salt
1 teaspoon
vanilla extract, or 1 inch vanilla bean scraped
1 tablespoon raw honey
Mix all ingredients in a food processor until smooth and well blended.
 Chocolate Ganache
From
"Raw Food Real World" by Sarma Melngailis and Matthew Kenney
Posted by RawYogini on
RFT
2 1/4 cup maple syrup (I used part agave)
1 cup
cacao powder
1 1/4 cup
carob powder
1 cup
coconut oil
Blend until smooth.
NOTE: It was so thick it caused my
blender to over heat so split the recipe in half and do it in 2 batches. Pour into your favorite nut/date crust. I used a springform pan. Chill in fridge for 2 hours. Amaze your SAD family and friends!
Caramelized Pecans
By
Renee Loux Underkoffler
2 cups pecans
2 tbs maple syrup, honey or
agave nectar
Cinnamon
Nutmeg
Soak pecans overnight. Then drain and soak in mixture for 30 mins. to 1 hour.
Dehydrate until crisp.
Assembly
Put some Caramel mixture into your crust of choice. Top with a layer of Chocolate Ganache. Decorate with Caramelized Pecans (or plain pecans would work too.)
Be prepared for a blissful experience!
 Double Chocolate Cream Tarts
Chocolate Cream
I came up with this variation of Cherie's Fudge from her Turtle Truffles recipe
(posted above). Simply add a little nut milk to the ingredients to obtain a creamy consistency.
Assembly
In crust of your choice, put a couple of tbs or so of Chocolate Cream. Then finish off with a layer of Chocolate Ganache (see recipe below). Decorate with a dollop of Chocolate Cream and nut of choice.
Alternatively, you could replace the Chocolate Cream with your favorite chocolate-based mousse or pudding, such as Maraw's
Raw Vegan Chocolate Pudding or Cherie Soria's Chocolate Orange Mousse,
and with or without the Ganache topping. Oh......... the possibilities!
Chocolate Orange Mousse with Almonds
By
Cherie Soria
Posted in the
San Francisco Chronicle food section.
1/2 cup
coconut oil
1/2 cup
agave nectar
3/4 cup raw
cacao powder
1/2 cup fresh-squeezed orange juice
1 tablespoon evaporated cane juice
1/4 teaspoon orange zest
1/4 teaspoon cayenne
Pinch salt
2 avocados, about 6 ounces each, peeled, seeded and mashed
1/2 cup peeled slivered raw
almonds, for garnish, optional
Place coconut oil in a small work bowl and place the bowl in a pan with about 1 inch of hot water. The coconut oil will melt.
Combine melted coconut oil, agave nectar, cocoa powder, orange juice, evaporated cane juice, orange zest, cayenne and salt in a high-powered blender. A regular blender will work, although it may not make the mixture quite as smooth. Puree until smooth; use a small rubber spatula to keep folding the mixture into the center to keep the mixture blending without adding water (you may stop the machine to do this). Make sure cane juice crystals are fully dissolved.
Add the mashed avocado and blend just until the mixture is smooth and creamy.
Pour into six 4-ounce ramekins. Serve each portion topped with slivered almonds.
Note: Agave nectar and evaporated cane juice are minimally processed sweeteners. They are available, along with raw cocoa powder, at natural food stores.
To peel almonds, place a heaping half cup of almonds in a glass bowl. Cover with hot water and let soak 15 minutes. Drain, peel skin off of almonds and slice into slivers with a sharp knife. Dry the almonds slightly before using, either by allowing to air-dry for 15 minutes, or spreading on a sheet pan and placing in a 100° oven for 5 minutes.
 Creamy Chocolate and Custard Tarts
My original intention was to use
Ertarox's
Raw Vegan Bavarian Vanilla Custard for these, but since I had some Coconut Creme left-over from making Jocelyn's brownies, I went with that instead. Here is the recipe anyhow...
Amazing Raw Vegan Bavarian Vanilla Custard
Posted by
Ertarox on RFT
2 cups young coconut meat (tough to say - 4 - 6 young coconuts?)
1/2 cup coconut water
2 tbsp. OJ
1/8 tsp celtic salt
1 vanilla bean
1 tsp.
vanilla extract
1/4 tsp. almond extract
1/4 cup
agave nectar
1 tbsp.
lecithin granules
1 tbsp.
coconut oil (I use expeller so it doesn't taste coconutty)
*Note: I'm Italian, so I use a bit more almond extract. Like EVERY Italian dessert is "Amaretto" flavored. LOL! But NONE are as good as this!
HINT: THIS IS PRETTY MUCH MY CUPCAKE FROSTING, I JUST USE A BIT MORE COCONUT OIL, SO IT WILL "SET" IN THE FRIDGE. YOU CAN ALSO USE IT AS A MIDDLE LAYER FOR A CAKE... I DID!
This is DIVINE.
Assembly
In crust of your choice, put a tbs or so of Chocolate Cream. Then fill the rest of the tart with Coconut Cream or Custard.
Am I missing anything? Let's see: Brownies, Truffles, Tarts, Turtles, Puddings... Wait a minute, I forgot to mention cheesecakes! Take a peek at my post,
Healthy Decadence, for droolsome chocolate cheesecake recipes.
Well, as they say, "all good things must come to an end"! Except, not really! Now you get to try all these wonderful treats and show your family and friends that chocolate never tasted so good!
Enough to make the sad Easter Bunny run off and hide in shame... lol
 Sunny Raw Tip
To help spread the chocolate mixture evenly when making truffles or tarts, simply smooth it up with wet fingers .
Whenever a recipe calls for agave syrup, I find it helpful to warm it up along with the coconut oil. This will prevent your chocolate mixtures from turning grainy and 'seizing up'.
Happy Easter everyone, and Blessings to you all!
*~*~*~*
Photo Credits:
Raw cacao beans by A30_Tsitika
Cacao Butter from
Naked Chocolate's site
Chocolate-Dipped Date Truffles by
Anna (Maraw)
Choc-onut Brownie by Jocelyn
Technorati Tags:
Raw, raw food, raw foods, raw recipes, recipes, chocolate, cacao, raw cacao, cacao bean, truffles, turtles, brownies, tarts, custard, coconut cream

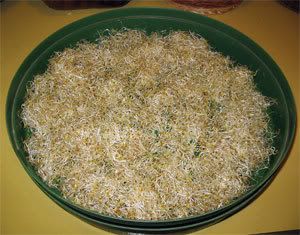
 Well, gardening is definitely in the air, isn't it! When we went to town earlier this week for our bi-monthly shopping, virtually every store we went to was displaying gardening supplies of one kind or another: tools, gloves, soil, seeds, plants, you name it!
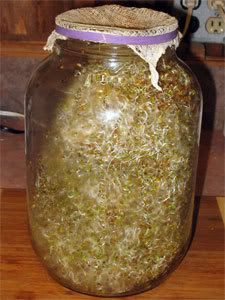
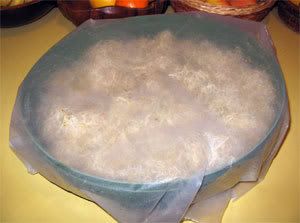
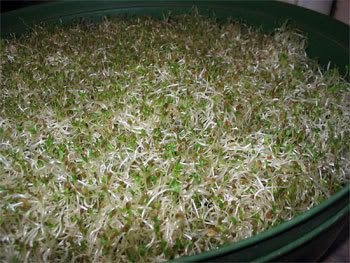
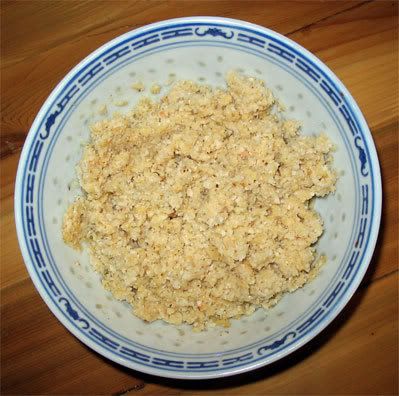
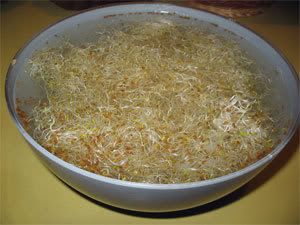 Then carefully separate the sprouts with the fork, since they've all gotten entangled in the sprouting process, and stir them around in the water. This will cause the hulls to loosen up and come to the surface. With a spoon, bring these over to one side of the bowl (see photo below) and scoop them out into a cup. This step is important, as it will make your sprouts more easily digestible. Plus, your sprouts look so much more appetizing without a bunch of little brown hulls.
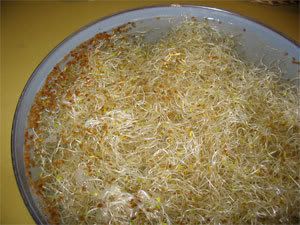


