Cultured foods are a wonderful addition to one's diet, as not only do they taste fabulous, but they also provide our guts with beneficial bacteria. While sauerkraut (I have a great article about how to make it here), kimchi, pickles and kombucha are more commonly known, a new one for me, coconut yogurt, is yet another super yummy fermented product.
You could use any type of coconuts to make the yogurt, but Matthew's favorites are Mexican coconuts. They are firmer than Thai young coconuts but lighter in color than the dark brown mature ones. One of the really cool things about using these coconuts is that you can also make the shells into bowls. Yay, a twofer! ;-)
But first things first: let's open the coconut!
When I arrived at Matt's he had already drained the coconut water by piercing a hole at the top of the shell and turning it upside down into some kind of receptacle. He had also shaved the outside of the shell down to the wood with a knife.
 How to Make a Coconut Bowl
Matt loves to make best use of everything, therefore he turns the discarded coconut shells into beautiful bowls. If you don't really want to do that - it does take extra time and work - you can simply shatter the shell into pieces by using a hammer.
If you do decide to go the bowl way, you'll want to have the shell sit flat on the counter - you may have to shave off the tip some in order for it to be more even. Consider how tall you'd like your bowl to be. Matt marks a line around the shell with a pencil with the help of a piece of cardboard with a hole.
On the picture below you can see a line above the one that Matt is making. This is where he thought he wanted it at first, but then realized that it would make the bowl a little too deep and difficult to reach with a spoon.

Next, with a heavy utility knife/cleaver with somewhat of a thick blade - definitely not your regular thin bladed chef knife, as you will damage the blade! - start carefully hacking along the line at a slight downward angle. Resting your cutting arm against your waist helps to stabilize your hand and therefore have more consistent cuts.

As you can see from the picture below, the cut mark on the side of the coconut is at an angle. That's because you will be chopping in a slight glancing stroke (not a straight on 90 degree stroke). You'll want to start chipping a small way from the line and move closer to the line as the material is removed or chipped away. At this point you don't want to pierce through the shell just yet as it would cause it to crack unevenly. Just chip about half way through the shell and move on around the line, repeating the chipping motion until you complete one round.

Once that first round is completed, as you keep working you'll notice that the knife will begin to stick more deeply into the shell. Again, just continue to work gently so that it doesn't crack before it's ready.


The next step is to extract the coconut meat from the shell. A hard flat plastic spatula works well for this. Matt uses a short handled Norpro spatula.

For the bottom part of the shell you might want to cut wedges to make it easier to remove the meat.


Well done! You managed to get all of your beautiful coconut meat out!


How to Make Coconut Yogurt
Alrighty, now back to making yogurt!
Matt shaves off all of the brown bits from the coconut meat. He puts these aside and throws them into smoothies or sauces.


You'll want to blend the mixture on high, with the help of a tamper to keep it moving.

If you have trouble processing at high speed due to air pockets you may have to stop and use the lower speed for a few seconds - no more - as you don't want to overheat and burn out your motor (higher speeds allow for more air cooling of the motor).

Run the blender for at least a couple of minutes in order to get the mixture very smooth. It's a good idea to keep track of the temperature in the process so as not to go over 105 degrees.


Matt also likes to throw in a wee bit of Spectrabiotic powder. (He buys his from this online store.)


Now back to the blender on medium, just to incorporate in the probiotics.


Cover loosely with a lid. Matt likes to use a metal one for the seal, but I'm sure just a plastic one would work too.

Place your jar of coconut yogurt in a warm place to culture. Since Matt lives in a trailer the temperatures tend to vary greatly, so he's set up a little cozy chamber for all of his fermentation. It's made of cardboard boxes and a heater hooked up to a thermostat set to 70 degrees. He then covers the whole thing with a blanket to keep the warmth in. Placing the jars inside a larger bowl can help in the event that the culture overflows (particularly when making sauerkraut.)

Start checking on your coconut yogurt after 24 hours or so. Depending on how tart you like it you may want to keep it culturing for up to 36 hours. In this next photo you can sort of see how much the cultured yogurt has risen in the front jar. The back jar is roughly the amount that it started off with.

Store the coconut yogurt in the fridge where it will keep for 7 to 10 days.
Voila! You can now make wonderful raw vegan coconut yogurt at home and even get a lovely wooden bowl to boot! ;-)
You could use any type of coconuts to make the yogurt, but Matthew's favorites are Mexican coconuts. They are firmer than Thai young coconuts but lighter in color than the dark brown mature ones. One of the really cool things about using these coconuts is that you can also make the shells into bowls. Yay, a twofer! ;-)
But first things first: let's open the coconut!
When I arrived at Matt's he had already drained the coconut water by piercing a hole at the top of the shell and turning it upside down into some kind of receptacle. He had also shaved the outside of the shell down to the wood with a knife.
 How to Make a Coconut Bowl
Matt loves to make best use of everything, therefore he turns the discarded coconut shells into beautiful bowls. If you don't really want to do that - it does take extra time and work - you can simply shatter the shell into pieces by using a hammer.
If you do decide to go the bowl way, you'll want to have the shell sit flat on the counter - you may have to shave off the tip some in order for it to be more even. Consider how tall you'd like your bowl to be. Matt marks a line around the shell with a pencil with the help of a piece of cardboard with a hole.
On the picture below you can see a line above the one that Matt is making. This is where he thought he wanted it at first, but then realized that it would make the bowl a little too deep and difficult to reach with a spoon.

Next, with a heavy utility knife/cleaver with somewhat of a thick blade - definitely not your regular thin bladed chef knife, as you will damage the blade! - start carefully hacking along the line at a slight downward angle. Resting your cutting arm against your waist helps to stabilize your hand and therefore have more consistent cuts.

As you can see from the picture below, the cut mark on the side of the coconut is at an angle. That's because you will be chopping in a slight glancing stroke (not a straight on 90 degree stroke). You'll want to start chipping a small way from the line and move closer to the line as the material is removed or chipped away. At this point you don't want to pierce through the shell just yet as it would cause it to crack unevenly. Just chip about half way through the shell and move on around the line, repeating the chipping motion until you complete one round.

Once that first round is completed, as you keep working you'll notice that the knife will begin to stick more deeply into the shell. Again, just continue to work gently so that it doesn't crack before it's ready.

Sometimes you might need to pry with the back tip of the knife inserted into the shell to get it to pop apart. Then pry the shell open with your hands.


The next step is to extract the coconut meat from the shell. A hard flat plastic spatula works well for this. Matt uses a short handled Norpro spatula.

For the bottom part of the shell you might want to cut wedges to make it easier to remove the meat.


Well done! You managed to get all of your beautiful coconut meat out!

This is what your shell will look like once it's been emptied out.

Matt evens out and smooths up the edges of the bowl with a serrated
knife.

Lastly he cleans the inside of the bowl with a sharpened butter
knife.

Tada!

How to Make Coconut Yogurt
Alrighty, now back to making yogurt!
Matt shaves off all of the brown bits from the coconut meat. He puts these aside and throws them into smoothies or sauces.

Once that's done he cuts the meat into small pieces and puts these in his high power blender container. You'll want it to be about 2/3rd full or so in order to fill one two quart Mason jar. This should take you one medium-large coconut or two small ones.

Now time to add coconut water. You'll want to pour just a few inches at first, only enough to blend. You can then add more coconut water, as needed. Bear in mind that as the mixture heats up it
will also blend easier. Depending on the coconut, at times
the meat is really fibrous and Matt has to add all of the coconut water as well as
some distilled water to get it to blend correctly.


If you have trouble processing at high speed due to air pockets you may have to stop and use the lower speed for a few seconds - no more - as you don't want to overheat and burn out your motor (higher speeds allow for more air cooling of the motor).

Run the blender for at least a couple of minutes in order to get the mixture very smooth. It's a good idea to keep track of the temperature in the process so as not to go over 105 degrees.

When you're happy with the texture, stop the blender and add probiotics. Matt has had best results using Donna Gates' Body Ecology Kefir Starter. You don't need much; he only uses a couple of these teeny spoons (the equivalent of 1/8 teaspoon or so total.)

Matt also likes to throw in a wee bit of Spectrabiotic powder. (He buys his from this online store.)

Like I said, you really don't need much at all!

Now back to the blender on medium, just to incorporate in the probiotics.


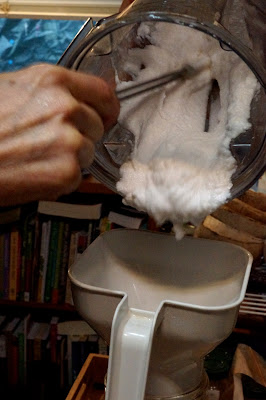
Time to transfer the mixture to a glass jar.

Be careful not to fill the jar more than 2/3rd full as the coconut yogurt will rise up as it cultures.

Cover loosely with a lid. Matt likes to use a metal one for the seal, but I'm sure just a plastic one would work too.

Place your jar of coconut yogurt in a warm place to culture. Since Matt lives in a trailer the temperatures tend to vary greatly, so he's set up a little cozy chamber for all of his fermentation. It's made of cardboard boxes and a heater hooked up to a thermostat set to 70 degrees. He then covers the whole thing with a blanket to keep the warmth in. Placing the jars inside a larger bowl can help in the event that the culture overflows (particularly when making sauerkraut.)

Start checking on your coconut yogurt after 24 hours or so. Depending on how tart you like it you may want to keep it culturing for up to 36 hours. In this next photo you can sort of see how much the cultured yogurt has risen in the front jar. The back jar is roughly the amount that it started off with.

Store the coconut yogurt in the fridge where it will keep for 7 to 10 days.
Voila! You can now make wonderful raw vegan coconut yogurt at home and even get a lovely wooden bowl to boot! ;-)








 Posts
Posts